


Summer days call for refreshing cocktails that capture the essence of the season. And this Watermelon Tequila cocktail recipe is the perfect way to beat the heat and indulge in a delicious blend of flavors.


Ingredients:
Instructions:
Tips and Substitutions:
This Watermelon Tequila cocktail is a delightful combination of sweet, tart, and refreshing flavors. The watermelon provides a natural sweetness, while the lime juice adds a touch of acidity. The blueberries and mint contribute a subtle fruity and herbal note, and the tequila brings it all together with a smooth, boozy kick.
Whether you’re hosting a backyard barbecue, relaxing by the pool, or simply enjoying a warm summer evening, this cocktail is the perfect way to celebrate the season. So gather your ingredients, mix up a pitcher, and raise a glass to good times and great flavors!
Cheers!
SHOP


Fall is a beautiful time of year to host a soiree, with its crisp air and colorful leaves. And what a better way to enjoy the fall foliage than with a delicious meal outdoors?
Decorate your table with fall-inspired elements and colors. For florals, we used faux autumn leaves placed inside a basket, they add height and interest to the table décor. We love to use dried limelight hydrangea this time of the year. It’s a beautiful and versatile flower that can be used in a variety of ways; it has a unique texture and muted colors. The brown wicked glass vase matched the other fall elements on the table.


For the linens we picked out a tablecloth with a rustic and natural look. For the napkins, we went with a neutral color finished with a bold border. The tablecloth and napkins are perfectly coordinated and complement the other elements of the fall table décor. The overall effect is a warm and inviting table setting that is perfect for a fall gathering.


SHOP THIS POST


Summer is in full swing, and there’s no better way to enjoy the warm weather than with a delicious and refreshing salad. This tomato, burrata, and peach salad is the perfect combination of sweet, salty, and creamy. The burrata cheese is the star of the show, and the peaches and tomatoes add a touch of sweetness. Burrata is a fresh Italian cow’s milk cheese that is made from mozzarella and cream. It has a soft, creamy texture and a mild, milky flavor. Peaches are a symbol of summer in many cultures. Did you know that in China, peaches are a symbol of longevity and immortality!?


Ingredients:
Tips:

This tomato, burrata, and peach salad is a delicious and refreshing way to enjoy the summertime. It’s easy to make and can be customized to your liking. So next time you’re looking for a light and flavorful salad, give this one a try!
Here are some additional ideas for customizing this salad:
I hope you enjoy this delicious and refreshing salad!
Shop This Post


Blue and white is a classic color combination that has been popular for centuries. It is often associated with the sea, sky, and purity, and it can create a sense of elegance and sophistication. Blue and white table decor can be used to create a variety of different looks, from formal to casual.
Start with a blue and white tablecloth. This will provide a classic backdrop for the rest of your tablescape.


Add blue patterned napkins. Don’t be afraid to mix patterns. When done correctly, mixing patterns can create a stylish look. However, it’s important to choose patterns that complement each other.

We used rattan round placemats and bamboo napkins rings; using various textures will help create visual interest and make your tablescape more dynamic. The plates are melamine. White melamine plates are a versatile and durable option for summer tablescapes. They are easy to clean and care for, making them perfect for outdoor dining. They are also lightweight and stackable, making them easy to transport and store. Acrylic glasses are a versatile and durable option for drinkware. They are made from a clear, lightweight, shatter-resistant plastic, perfect for outdoor events. We are absolutely in love with the design of this one .


Hydrangeas are a quintessential summer flower, and you can’t go wrong adding them as your centerpiece. They are beautiful and versatile flowers that can be used in various ways. Hydrangeas in baskets are a beautiful and elegant way to add a touch of nature to your table. Baskets can create a unique and eye-catching centerpiece.

A white and blue tablescape can be quite simple, but it’s important to keep the overall look simple. Too many elements can be overwhelming and detract from the beauty of the colors. No matter what your style, there is a white and blue summer tablescape that is perfect for you. With a little creativity, you can create a tablescape that is both beautiful and inviting.

Shop This Post


We love hydrangeas; they are one of our favorite flowers. It was one of our grandma’s favorite too; maybe that’s why we like them so much. It reminds us of her!! They are so simple yet have a significant presence with their large flowerhead. They always stand out, whether it is an all hydrangea arrangement or mixed with different flowers.


If you want to learn how to arrange flowers, hydrangea is a great place to start. They are easily accessible at most grocery stores and one of the easiest and least expensive arrangements to create.
Hydrangeas take a lot of water and can wilt quickly if not properly cared for. As soon as you bring them home, cut each stem at a 45-degree angle and put them immediately in water; this will allow the blooms to drink more water. When purchasing from your local store, often they come with flower food; make sure to use it.
If you are picking from your garden, after cutting them, boil water and dip each hydrangea stem into it for thirty seconds and then place it in a vase with room temperature water.

Hydrangeas drink water from their bloom heads as well, and spraying water on them helps prevent them from wilting. In case they do wilt, you can dunk its whole head in room temperature water.
Keep your hydrangea arrangement at a cooler temperature and away from drafts or direct sunlight. Replace the water every other day. With proper care, your hydrangea arrangement can last for weeks.
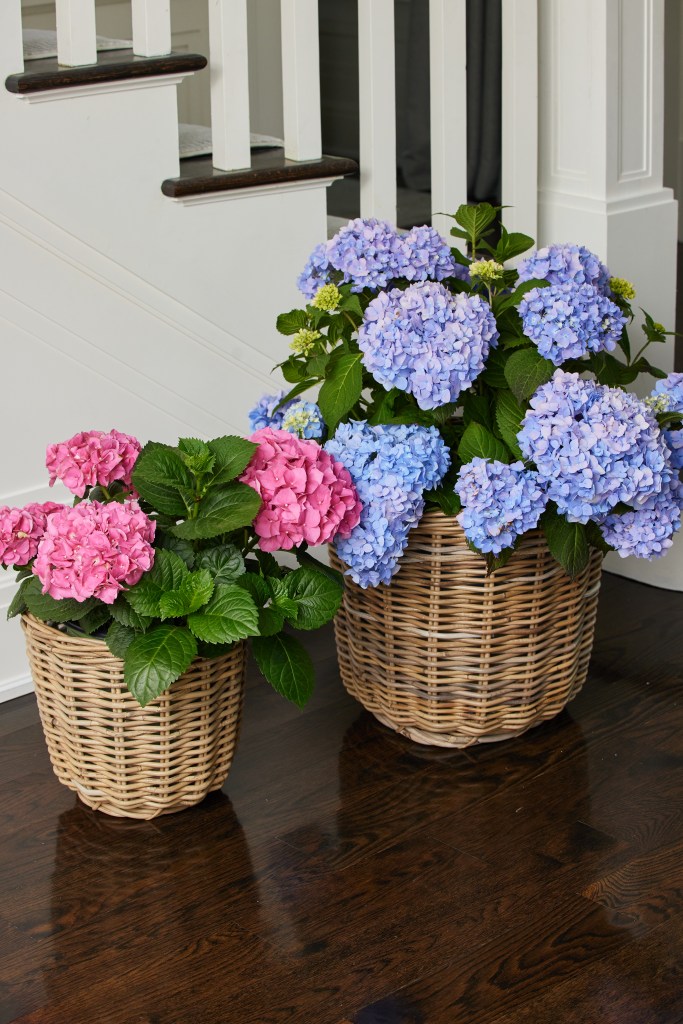
Potted hydrangeas look so beautiful and will last much longer than cut ones, especially if you pick one with few blooms and lots of buds.

Water the plant often, feel the soil, and if the top layer feels dry to the touch, it’s time to water it. Drainage is essential; make sure there are drainage holes at the bottom of the container you selected. Place your potted hydrangea where it receives bright light but not direct sunlight.
Shop This Post


This appetizer is effortless to make and is such a crowd-pleaser. It’s a classic that everybody loves, perfect for any occasion! I bought the blinis at my local grocery store to make it even easier. However, you can make them at home.
The DILL CRÈME FRAICHE you can make the day before and store in the refrigerator. Recipe below.
Assemble:
Spread the dill crème fraîche on a blini. Coil on a piece of salmon, top with chives or dill.
Enjoy!!


SHOP THE POST


Calling all Nutella lovers!! We are absolutely obsessed with Nutella, and we love anything with it. This vanilla, strawberries and Nutella buttercream cake is soooo good and beautiful. It’s perfect for Mother’s Day!
–Vanilla box cake: choose your favorite box cake, and prepare the batter according to the instructions. Split the batter into two round 8″ cake pans, and follow the instructions to bake them.
–Strawberries: put them in a strainer and rinse with cold water. Remove the green stems and slice them in half (vertically).
–Nutella buttercream recipe: the original recipe is from Sugar & Sparrow.
Jump to RecipeAssemble the cake:
Once you have finished the Nutella buttercream, it’s time to assemble the cake. Level the vanilla cake, and add the butternut cream and strawberries.
Follow with another layer of the cake, butternut cream, and strawberries
Garnish with chocolate on top.

Calling all Lime lovers. This semi-homemade cake is easy and quick to put together. It’s light and packed with fresh flavors—the perfect ending to a summer dinner.
Jump to Recipe
Start by baking two boxes of lemon supreme cake mix accordingly to the box baking instructions. We divide the batter in 4 round cake pans (about 9”). Allow cakes to cool completely in the pan. The cakes must be completely cool before frosting and assembling.

Now, it’s time to make the frosting!! In a large bowl, using a mixer fitted with a whisk attachment beat the whipping cream on medium speed until it begins to thicken. Keep mixing, add the condensed milk and the confectioner sugar. Increase to high speed, and beat until the cream is very stiff, and stands in firm peaks on the beater when it is lifted from the bowl.


Stop mixing and slowly add the lime juice and using a French whisk mix all together. Your lime Chantilly will be ready!


Let’s assemble the cake! Turn the cakes down and using a large serrated knife, slice a thin layer off the tops to create a flat surface. Place the 1st cake layer on your cake stand. Spread about 1 and 1/2 cups of frosting evenly on top. Top with the 2nd cake layer, and evenly cover the top with another 1 and 1/2 cups of frosting. Do the same with the 3rd and 4th layer.


After the last one, spread the remaining frosting on top and around the sides using an icing spatula. Use a bench scraper to smooth out the frosting on the sides of the cake. Decorate the cake with lime and mint.


SHOP Cake Stands


It is no secret that we love fresh flowers at home. They quickly brighten up any space and makes it more inviting. If you are new to flower arranging, the idea of creating your own bouquet can be a little overwhelming. But don’t get discouraged!! With the right tools, flower arranging can be fun and simple.

If this Spring, you feel inspired to start creating your floral arrangements, make sure that you have some basic tools on hand. And don’t forget: The first step to mastering a skill lies in the dedication and practice you put into that new hobby.
There are a lot of florist’s tools right there. But to make it simple, we have listed some of the basic tools that we use in our arrangements:
Floral clippers
A good pair of floral clippers is key to creating a flower arrangement and ensuring that each stem is cut correctly to allow the flowers to drink water.
Pruners
Thicker stems and branches can be a problem without the right tool. The branch cutters are similar to floral clippers but can easily cut and clip more rigid stems.


Floral Tape
Floral tape is a must-have! They come in different colors and can be used for wrapping stems and lining vases. We use the clear tapes more often than the green ones, but both work great.
The clear floral tape is helpful to create a grid on top of the containers to help flowers stay in place and add support. We replaced the floral foams with clear tape and the chicken wire, and we don’t regret it! The green waterproof tape can be used to secure the bases of stems together.
Chicken wire
They are also called ‘wire mesh’ or ‘wire netting’. Like the floral tapes, the chicken wire adds support to the arrangement and gives you control over the structure of the arrangement. They can be bent to help guide and hold your arrangements in large containers.


Flower Thorn Strippers
This tool is easy to remove thorns and leaves from the stems, especially from roses. Begin by pulling down gently down the stem of a rose. It is important, to begin with, enough space down from the rose head to prevent it from falling off.

Moss
Add green or Spanish moss for a more finished look at your potted arrangements, terrariums, and baskets. Don’t use the moss in a vase of water with flowers; use it in an arrangement that doesn’t sit in vessels of water. If using the green sheet moss, make sure to saturate it before using it.
Spray bottle
After we complete an arrangement, we finish it with a light mist of water to hydrate the blooms, especially the hydrangeas.

Optional: If you have a lazy Susan, prop your vase on it to easily move around your vase and check all sides.
Shop our tools
Note: As an Amazon Associate, we earn from qualifying purchases.


